I headed over to Royal H Cycles in Somerville yesterday, where frame builder Bryan was able to bend my fork blades. He actually has a bending tool similar to what I was planning to build, which was encouraging to see. I will have to try to finish my own bender and try it out on some scrap tubing.
One piece of advice Bryan gave that I had not fully considered is the trail of the bike. Trail is defined as the horizontal distance from the axis of rotation of the front wheel (the center of the hub) to the extended centerline of the steerer tube. Proper trail allows the front wheel to act like a caster; hitting an obstacle that changes the direction of the front wheel won't suddenly change the direction of travel of the whole bicycle. A shorter trail makes the bike more responsive but will lead to instabilities - track bikes will often have short trails, since there aren't things like potholes or sticks to run over on the track.
With my desired head tube angle and rake, the bike was going to have a relatively short trail; UBI apparently recommends somewhere in the vicinity of 55-65 mm, and my design was floating around the 35 mm area. To solve the problem, I'm going to reduce the head tube angle to 72 degrees, which BikeCAD says will give me 58 mm of trail. Since I still want the same frame size (especially the head tube, since I've already cut the steerer with that dimension in mind), this will effectively lengthen the fork blades by about 10 mm and the down tube by about 85 mm. Convenient, since I haven't cut any of these tubes yet.
A more significant problem will be sourcing a head tube lug with a 72 degree angle. Most of the lugs available are angled at either 73 or 74 degrees, so finding one "off the shelf" may be difficult. One option will be to purchase a 73 degree lug and open it up a little bit by hand.
Next steps are to cut the fork blades to length, slot and dome them to accept the dropouts, and then file the fork crown tangs and braze everything together. I'll have some photos of Royal H soon.
Wednesday, June 30, 2010
Tuesday, June 29, 2010
Fork Blades
I was expecting to have my fork blades bent over the weekend and writing up the process early this week, complete with color photos and maybe even an informal interview with the frame builder who said he would help me.
None of this happened.
Instead, I waited around all Saturday afternoon for a call, only to never receive one. I sent the guy an e-mail Monday morning asking what happened, and his reply told me that he would be available today, Tuesday - just drop the blades off at his shop. So, there will likely not be any photos or talk with the frame builder and I have no insight in to when this work will actually get done.
I realize that asking to bend my fork blades is pretty small potatoes compared to purchasing a full custom frame, but there is a certain amount of professionalism that is lacking here. Even a phone call trying to reschedule would have been fine with me.
Best case scenario - I get the blades bent today and everyone goes home happy. In reality, I'm expecting that it will take a few days and I won't get to continue work until after the July 4 holiday. If everything conspires against me, the work won't get done, I won't get my blades back, and I'll be out twenty bucks.
Wednesday, June 23, 2010
Cleaning up joints
I spent about an hour in the basement yesterday cleaning up the joint I made over the weekend. The solder material is much softer than the steel, which makes removing the excess pretty easy. I used a triangular mill file to remove the bulk of the excess; the points on the file worked great at keeping the joint clean and sharp.
After removing most of the extra solder with the mill file, I alternated between a medium-grade emory paper and a square needle file. The emory paper was better at removing material from the steerer tube, while the needle file was good for removing material from the fork crown and keeping the joint profile square.
I noticed a small amount of pitting in the solder while I was cleaning it up, and I'm not sure what to make of that. I was removing material from the "bottom" of the weld - where the solder flowed out of the joint - which is actually the top of the fork crown. I think, but am not positive, that the pitting is probably due to the fact that I tried reheating the joint in some places to get more solder in and fill in the small section of the joint that didn't have a large glob coming out the bottom. I could try to file the joint down some more, but this will all be hidden by the headset, so I'm not sure it's really necessary.
After finishing the outside of the joint, I took a round file and cleaned out some of the junk on the inside of the tube. I also had missed some flux that had dripped into the steerer threads, so I took out the wire brush again and cleaned that up. I think this joint is now "done". There will be more work to do after the fork blades are attached.
One thing I realized - after the bike is finished, there's going to be a large hole in the bottom of the fork crown where the steerer tube ends. Do people normally seal these up somehow? Without a fender, a lot of grime and muck is going to get thrown into the fork. I've never noticed a hole on any other bike I've owned, but maybe I'm just not attentive enough.
Tuesday, June 22, 2010
On Bending
I think I have a lead on getting my fork blades raked. It's probably not going to happen until this weekend, so this week will probably be a little slow - I can finish the steerer joint, but after that I have to wait on the blades before I can continue work on the fork. In the meantime, let's look at the different options I've considered for bending blades.
Talbot makes no mention of how to rake fork blades, because he was able to purchase pre-raked blades for the frame he builds in his book. I have not found any source of bent fork blades, which means that it's up to the builder to do this work. Without a large work shop and heavy machinery, I'm at a bit of a disadvantage.
The first plan I had in mind was based off of this builder's fork bender. I went to the local woodworking shop and got a heavy piece of maple. Cutting it with a jigsaw, I realized that the wood was slightly warped, meaning that the saw did not make a flat cut. I could have solved this problem if I had a wood plane. A second problem arose - how do I cut a groove in the wood to accept the tubing? I was unwilling to purchase a router (or router table), and hand methods would have taken a considerable amount of time - not to mention being inaccurate. So, scrap this idea for now. I may continue to work on it for future bikes.
Some more research put me on to the idea of a conduit bender. These tools are used to shape electrical conduit, and it looks like recumbent builders have put them to use increasing the rake of previously fabricated forks. Off I went to Chasen Industrial Supply, who have a terrible website but a really fantastic set of folks on staff. Unfortunately, after talking the idea over with the folks at the store, they convinced me that I was very likely to crush or kink the tubing trying to use a conduit bender; conduit is much thinner and more malleable than the tubing for a bicycle fork, and the benders just don't seem to be up to the task. (Although, if you have any hard experience successfully bending a straight fork with a conduit bender, let me know!) They did have the Dykem I was searching for, though, so the trip was not all in vain.
When I got home, I called around to some of the bike shops and fabricators in the area. Independent Fabrication told me that they only use straight blades (the rake is achieved with an angle at the crown). I also called the Broadway Bicycle School in Cambridge - they have an open shop that one can rent by the hour. They don't have the tools, but they did suggest calling Geekhouse Bikes in Allston. I left a voice mail with them, but also surfed through their Links page to Royal H Cycles in Somerville. Bryan told me he'd be willing to rake the blades for me with his homemade bender for a nominal fee. This is the route I'll be taking for now.
What other options are there? Nova Cycle Supply sells a bender for $375, which is outside my price range for this project (especially considering the likelihood of being able to resell the tool is pretty minimal). Finally (and the option that I'm most attracted to but least equipped for), I could make a bender out of metal.
Homemade benders that I've seen online tend to have a large radius curved metal block with a groove in it for the tubing - similar to what I was trying to make out of wood. They also have a long handle that is pinned to the block so it can rotate around the curve; the handle has a roller on it that guides the tubing around the curve. Making something like this would require a machine shop - at the very least a mill, which I don't have the money or space for. However, there is a new community workshop opening in the Boston area which should have the capabilities I would need.
I feel a little chagrined about not bending the blades myself, but I'm coming to terms with the idea that it's ok to outsource when you don't have the capabilities yourself (I'll let someone else paint the bike, for example). Maybe after visiting Royal H, I'll have a better idea of how to build my own for future projects.
I also wanted to share an acronym I learned from the framebuilders e-mail list - SOPWAMTOS. It stands for "Society Of People Who Actually Make Their Own Shit", and I'm obviously not following the spirit of it by not building my own tooling. One day!
Friday, June 18, 2010
The Big Day
I performed my first braze joint today. Before spoiling the outcome, let's go over the process...
Yesterday, I spent about two hours filing the fork crown. Talbot recommends doing some rough finishing on the crown before brazing the steerer to it in order to reduce the amount of mass that needs to be heated, making it easier to heat the whole joint with a simple hardware store torch. I removed the rough casting finish off the crown, leaving the bulk of it shiny and relatively polished. In retrospect, I would have liked to measure the weight of the crown before and after the filing operation; honestly, I'm not sure I removed more than a few grams.
After work today, I assembled my equipment on our apartment balcony:

Using mineral spirits and a rag, I cleaned the steerer tube and the fork thoroughly. This is an important step to ensure the braze is not contaminated; metal is generally treated with a preservative before you, the user, receive it (I believe it's mineral oil-based), and must be removed. Cleaning the inside of the tube was difficult, but I was able to get the first inch or so by stuffing the rag into the tube with my finger.
Here's what the parts looked like after cleaning:

The cleaning really highlighted the minor marking and scratching leftover from using the emory paper on the parts. It also revealed some imperfections that I missed when I was doing the finishing work earlier (a couple of nicks, likely from the hacksaw). Smoothness of the parts is important to ensure a strong joint, and I think that the two parts were finished enough to braze them together.
Here are the parts and the brazing materials:

The roll of silver solder is worth about $125. the flux cost about $10.
I clamped the steerer tube into the workbench and applied flux to the joint end:

White flux is used for standard ferrous materials; there is also a black flux that is used for stainless steel. I coated the inside and out with a generous amount of flux. I've seen some framebuilders' websites that show significantly more flux than what I used, but I honestly didn't see the point - my impression was that it was just going to make a mess in places that weren't being brazed.
Applying flux to the inside and outside of the crown, and fitting the two pieces together:

As I mentioned before, the crown has small tabs to keep the steerer in place. If yours doesn't, and the crown slides on the steerer, you can pin the two together by drilling a hole through and through (notice the small round dimple) and holding everything together with a steel nail. You can then drill it out later when you make the brake hole. The whole assembly is clamped in this orientation to allow gravity to help the solder flow through the joint.
Now - deep breath, fire up the torch, and get heating. Some observations:
The flux started running literally as soon as the fire hit it. It dripped down the steerer and on to the workbench, which I did not expect at all. It didn't seem to be a problem, and it was pretty easy to remove from the workbench.
I expected a bit of difficulty getting the parts heated, but within a few minutes I noticed a dull red glow coming from inside the steerer tube. Encouraging! As the joint continued to heat, the flux started to bubble and brown, almost looking like a marshmallow over a fire.
I tried to keep the torch moving around the whole circumference of the tube during the initial heating; as things began to glow, I started concentrating on one half of the tube. Every so often I would test the joint with the silver solder, and all of a sudden it started to melt into the joint. Pushing the solder slowly in to the joint, I kept an eye on the bottom of the joint to watch for the solder to come out the other end.
After the first half of the joint was done, I had noticed the other half got a little cold; it took another couple of minutes to get it back up to temperature. Also, I had seen some minor blacking on the steerer tube below the joint. It was difficult to tell if it was the metal discoloring or the flux overheating.
There was one small section that was very difficult to tell if solder had penetrated all the way through, but I kept pushing more in and didn't notice anything further coming out the bottom (I think it was spilling into the inside of the tube). Just like that, it was over.
The finished joint, still hot:

The dripped flux is on the opposite side of the tube. I let it cool in the bench for a few minutes while I put stuff away and filled up a bucket with warm water. Using a stiff wire brush and the water, I cleaned the remaining flux off the assembly:

And here is what the assembly looks like with all the flux and soot finally removed:

You can see the point of least penetration in the center of the photograph; luckily, it managed to come all the way through! I think the joint should be pretty strong.
Another interesting point - the crown blackened where there was no flux present. The steerer remained relatively unchanged, except for a minor discoloration in one spot that I removed with the brush. The crown also started oxidizing fairly quickly after I dried it off; After the blades are attached, I'll have to go over the whole assembly with more emory paper to remove the rust before painting.
The next step before this is 100% complete is to file the joint down again to remove the excess solder. After that, on to the fork blades. I still haven't settled on a method to bend the blades; a visit to an industrial supply store disabused me of the idea of using a conduit bender. I'm in the process of calling local frame builders to see if any of them have the capability to bend tubing and who can lend me a hand.
Tuesday, June 15, 2010
First Cut
As I've alluded to already, I cut the steerer tube for the fork last week. This marks the very first operation I've performed that directly counts towards the construction of the bike!
First things first - without any layout fluid, I had to get creative with the markings on the tube. I tried scratching a mark in the side of the tube first, but it ended up crooked and very difficult to see. So I formulated a Cunning Plan (watching too much Blackadder will do that). I wrapped some masking tape around the cut end, as such:

I used the hobby knife to cut away the tape up to the location of the cut on the tube. To get it even, I held the knife against the square, blade up, and rotated the tube while holding flush against the short end of the square. It worked pretty well, but there was a small section of tape that I didn't get all the way through.
I will back up quickly here to discuss butted tubing. The steerer, like most of the rest of the frame, is made of tubing that has a thicker wall section at the ends than in the middle. This allows for a lighter overall weight while beefing up the tubing at the points of highest stress, the joints. Tubing for the main triangle of the frame usually has one end with a longer butt than the other and is marked with paint or some other indication; this is the end you want to cut. Completely removing the butt will greatly impact the strength of the frame.
In the case of the steerer, only the non-threaded end is butted (if you're using a threaded headset). The threads should not be cut at this point, but Talbot implies that end of the steerer may be trimmed later if some of the threads stick out of the headset after assembling the fork to the frame. Before cutting the tube, I measured the butt length - it's easily noticeable by looking inside the tube, and I used the depth gauge on the digital calipers to feel around for the taper. It's about 50 mm long, and I needed to remove about 30 mm of length, so everything was a go for cutting. (Threaded steerer tubes come in various lengths, and the one closest to your design should be chosen. Obviously, choosing one that is shorter than you need is going to cause some heartache later down the road.)
After removing the excess tape, I clamped the tube into my mobile workbench:

I used a 12" hacksaw with a 24 TPI (teeth per inch) blade to cut the tube. Because the saw blade is a little flimsy (and I have already proven to myself how good I am at making straight cuts), I began about 1/8" beyond the tape, with plans to use the files to finish up. I restarted the cut several times by rotating the tube about a quarter turn and fitting the blade back in to the end of the previous cut.
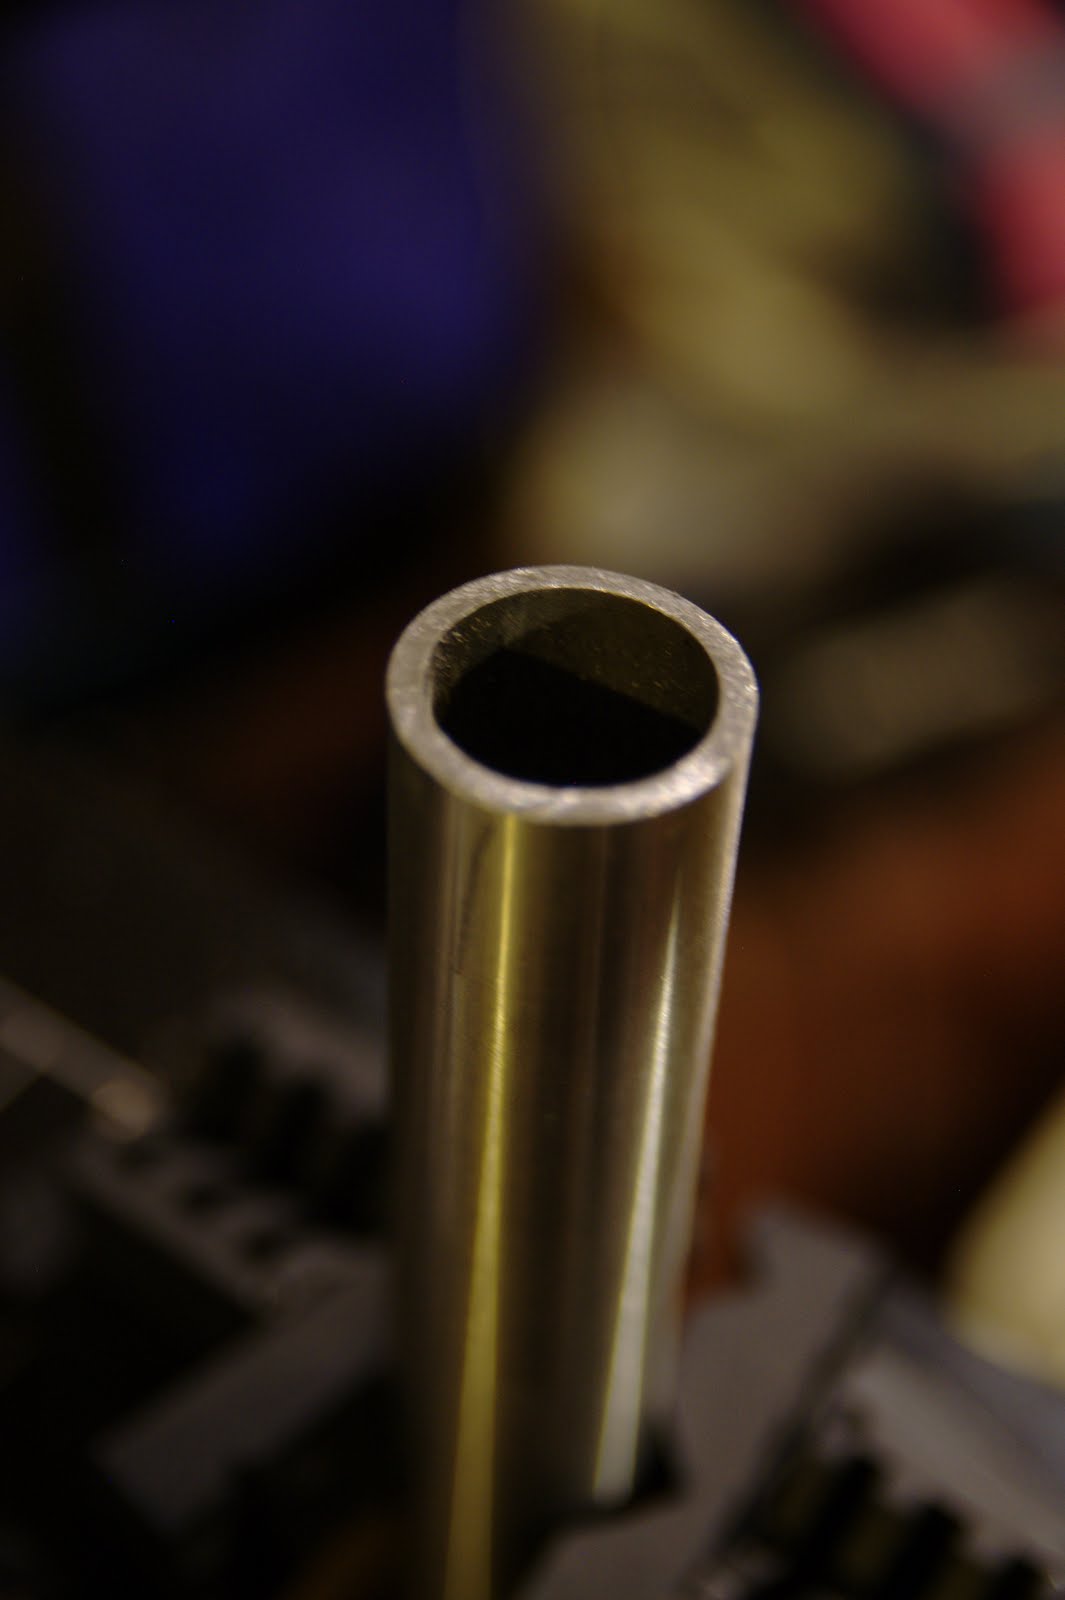
Here is the tube after using the hacksaw:

The hacksaw bucked a couple of times and tore the tape, which is probably why machinists do not use tape to mark cuts. Nevertheless, I pulled out the flat mill file and got to work. The file also took out some of the tape. However, progress is so slow using the file that there was plenty of time to stop and examine my work to prevent removing too much material.
I started bumping up against the limitations of my workbench while using the file. The bench is so lightweight that any lateral force (such as pushing the file across the face of the steerer tube) has a tendency to push the workbench around. I may look in to sandbags to brace the workbench.
After filing, here's what the end of the tube looked like:

Overall, I think it's a pretty good job. The end of the tube is not perfectly faced off - there's about a 1 mm variance - but the joint is made along the length of the tube, not at the end. If I had a crown that allowed the steerer to slide all the way through it, I could stick the end out and file it flat to the crown after the joint is made; as it is, my crown has small stops that prevent the tube from going all the way through.
After filing was completed, I took some fine grain emory cloth and cleaned up the inside, outside, and the end of the tube. This removed the small nicks from the hacksaw and prepared the tube for brazing - a smooth face provides the best joint.
All that's left is to clean the tube with a solvent and fire up the torch!
First things first - without any layout fluid, I had to get creative with the markings on the tube. I tried scratching a mark in the side of the tube first, but it ended up crooked and very difficult to see. So I formulated a Cunning Plan (watching too much Blackadder will do that). I wrapped some masking tape around the cut end, as such:

I used the hobby knife to cut away the tape up to the location of the cut on the tube. To get it even, I held the knife against the square, blade up, and rotated the tube while holding flush against the short end of the square. It worked pretty well, but there was a small section of tape that I didn't get all the way through.
I will back up quickly here to discuss butted tubing. The steerer, like most of the rest of the frame, is made of tubing that has a thicker wall section at the ends than in the middle. This allows for a lighter overall weight while beefing up the tubing at the points of highest stress, the joints. Tubing for the main triangle of the frame usually has one end with a longer butt than the other and is marked with paint or some other indication; this is the end you want to cut. Completely removing the butt will greatly impact the strength of the frame.
In the case of the steerer, only the non-threaded end is butted (if you're using a threaded headset). The threads should not be cut at this point, but Talbot implies that end of the steerer may be trimmed later if some of the threads stick out of the headset after assembling the fork to the frame. Before cutting the tube, I measured the butt length - it's easily noticeable by looking inside the tube, and I used the depth gauge on the digital calipers to feel around for the taper. It's about 50 mm long, and I needed to remove about 30 mm of length, so everything was a go for cutting. (Threaded steerer tubes come in various lengths, and the one closest to your design should be chosen. Obviously, choosing one that is shorter than you need is going to cause some heartache later down the road.)
After removing the excess tape, I clamped the tube into my mobile workbench:

I used a 12" hacksaw with a 24 TPI (teeth per inch) blade to cut the tube. Because the saw blade is a little flimsy (and I have already proven to myself how good I am at making straight cuts), I began about 1/8" beyond the tape, with plans to use the files to finish up. I restarted the cut several times by rotating the tube about a quarter turn and fitting the blade back in to the end of the previous cut.
Here is the tube after using the hacksaw:

The hacksaw bucked a couple of times and tore the tape, which is probably why machinists do not use tape to mark cuts. Nevertheless, I pulled out the flat mill file and got to work. The file also took out some of the tape. However, progress is so slow using the file that there was plenty of time to stop and examine my work to prevent removing too much material.
I started bumping up against the limitations of my workbench while using the file. The bench is so lightweight that any lateral force (such as pushing the file across the face of the steerer tube) has a tendency to push the workbench around. I may look in to sandbags to brace the workbench.
After filing, here's what the end of the tube looked like:
Overall, I think it's a pretty good job. The end of the tube is not perfectly faced off - there's about a 1 mm variance - but the joint is made along the length of the tube, not at the end. If I had a crown that allowed the steerer to slide all the way through it, I could stick the end out and file it flat to the crown after the joint is made; as it is, my crown has small stops that prevent the tube from going all the way through.
After filing was completed, I took some fine grain emory cloth and cleaned up the inside, outside, and the end of the tube. This removed the small nicks from the hacksaw and prepared the tube for brazing - a smooth face provides the best joint.
All that's left is to clean the tube with a solvent and fire up the torch!
Monday, June 14, 2010
Weekend Update
I'm still being lazy about getting photos off my camera, so the tube cutting will have to wait another day.
I took Friday off from work, partly to wait for the appraiser to look at some damage to my car from a hit-and-run, but mostly to go to the welding supply shop. I rode my Specialized down to the shop and the helpful folks there got me everything I needed. As it turns out, the shop I went to supplies all the bike builders in the area (including Seven Cycles in Watertown), and the employee I dealt with knew exactly what I needed.
I have never purchased precious metals of any kind before, jewelry or otherwise, so this was my first direct experience with commodity prices. With the recent high prices of precious metals, silver solder is extremely expensive - the roll of solder wire I purchased cost $125, which included about 4 Troy ounces of silver. I also purchased a pound of brass brazing rod - six dollars. If you've got the heat, it seems obvious that brazing the whole bike with brass would be the economical choice. For the time being, I'm still planning to use my hardware store torch.
In addition to the solder wire and brazing rod, you need flux. Flux is a chemical compound that acts as a cleaning and "wetting" agent for brazing material, and comes in a variety of types. I purchased a paste-type for the silver solder (and brushes for the paste) and powder for the brass; the powder was the only flux the shop had available for the brass, as it seems most people now use flux-coated rods.
For the paste flux, a liberal amount is brushed onto both pieces of metal before they are joined. The joint is then heated until the flux begins to look watery, and then the filler material is introduced. Powder is used in different ways depending on the brand and style, so check the instructions on the tin. For the powder that I purchased, the instructions say to heat the brass rod and then dip the rod into the powder; the powder will stick to the rod, and then it is wiped on to the (hot) joint before the filler is added to the joint.
Silver solder is generally used for tight-clearance joints - joining tubes to lugs, for examples. The brass is used for wider tolerances because it can fill gaps and still maintain strength; here, it will be used to join the dropouts to the stays and the fork blades.
I also swung by Home Depot later in the weekend to pick up some gardening supplies. While there, I picked up a 2x4 scrap - the Big Orange Box is apparently selling their scraps now, as they had a whole lumber trolley filled with odds and ends and priced to move. I got a three foot section for 51 cents. I also picked up a miter box to make a square cut and not screw around with trying to do it by eye anymore.
Once I got home, I discovered my saw is too wide to fit into the miter box. However, since it's made out of cheap plastic I was able to widen the slots in the box and cut a straight line into the wood at the same time. Have a flat face to measure against made it much, much easier to accurately drill a hole into the block to accept the threaded rod. I applied wood glue to the rod, slid it into the hole, and then "sealed" the hole on either side with more glue. The block/rod assembly was the glued on to the fork jig backboard, using the framing square to ensure everything was lined up properly.
So, the fork jig is done after I reinforce the glued joints with some wood screws. I believe that I'm going to purchase a conduit bender to take care of the rake; I don't think I can build a bender of the maple with any degree of accuracy, and the cost of messing up the bend is a bit steep. There's no unbending the blades once they're bent.
I'm still wary of purchasing expensive tools ostensibly to use them once (for bending the fork blades, for example). Someone keyed me in to the idea of purchasing tools and then reselling on craigslist once I'm finished with them, so I may try to take that route.
Thursday, June 10, 2010
Hits and Misses
I spent a few hours in the shop (read: basement) last night. I think that my idea for the dropout block on the jig isn't going to work; I simply can't cut straight enough with the hand saw that I have to then get an accurate hole drilled in the block. Since the only wood scraps left in the basement are lengths of 1"x1" hardwood, I think I need to take a trip back to Home Depot to beg for scraps from them. They're close to the welding supply store, which will save me a trip.
I bought a length of threaded rod yesterday and cut it to length, as well as performing my first operation on an actual bike part - cutting the steerer to length and filing the end flat. I'll have a more in depth write-up when I get the photos off my camera.
The hacksaw that I purchased from Harbor Freight is a little flimsy, but it gets the job done. Unlike some of the more expensive options, this one only accepts 12" blades. It conveniently came with a 28 TPI (teeth per inch) blade included; the blade was coated in some sort of blue plastic/polymer (presumably as either a preservative or safety mechanism) that stained the metal when I was cutting.
Cutting threaded rod is fairly straightforward. The grooves offered by the thread provide a guide so that the cut doesn't start to stray. I purchased a 3/8" diameter rod, which fits the dropouts almost perfectly, and it took about five minutes to cut through at a steady pace.
The steerer took about 10-15 minutes to cut through and another 45 minutes to an hour with the file. Your arms will get tired.
One tip to keep in mind when cutting anything with threads - put a nut on the thread beyond the point of your cut, and then back the nut out through the cut section after you're done. This will straighten out the threads that may have been damaged during the cutting process and will allow you to thread nuts back on to the rod more easily later.
The dropout block will use a total of six nuts to hold the dropouts in place. Two nuts on either side will be used to set the location of the dropouts - tightening two nuts against each other will lock them in place so they don't shift during brazing. The third nut on either side will clamp the dropout in place.
If I had a table saw and a drill press building the dropout block would be much easier, but I've only got hand tools and so will have to do my best. The concern is that it's crucial to have the rod as accurate as possible; otherwise, the fork will be misaligned.
More shopping tomorrow - to the welding store and Home Depot. I'm hoping the welding store will let me take a few photos to show some of the different consumables available.
Tuesday, June 8, 2010
Back Home
I've returned from my business trip, and it's time to get back to work. I'd like to finish the jigs this week and hopefully begin working the steerer and the fork crown.
One thing I'm starting to realize - working with maple is hard. It was a significant challenge cutting the curve into the block of wood, and now I'm wrestling with how to cut a trench in the edge of the wood to accept the fork blades. Doing it by hand is probably time-prohibitive, but I don't know anyone with a router table or other equipment capable of doing this work. There's a woodworking shop down the street that I may consult with, but if I can find a conduit bender I may rent/borrow/steal one.
Because I cut the window in the fork jig too large, I need to cut the clamp block down a little shorter. I also need to square the ends of the dropout block and drill a hole in it for the threaded rod that will hold the dropouts (still need to acquire the rod and some nuts, too...). After that work is done, I can attach the blocks to the backboard.
I still haven't found a local source for Dye-Kem and have yet to purchase any brazing consumables. I think I will plan to leave work early on Friday to take a trip to the welding store.
Subscribe to:
Posts (Atom)