Monday, August 30, 2010

Fork Brazing and Finishing

The final steps to complete the fork are brazing the blades on to the fork crown and then cleaning up the mess.  After brazing, check the alignment of the fork with a trued wheel; if it wobbles, you must cold set the fork.  Cold setting is the process of mechanically adjusting the alignment of the fork blades, usually by carefully bending them into place with a cheater bar.

First, the tangs on the crown need to be cleaned up.  Casting leaves a slightly rough and pitted finish which must be removed, leaving behind a smooth face for the filler to bind to.

Clamping the steerer/crown assembly in place:


I started with the warding file, then worked the tangs with course grade emery paper.  The emery paper is used in an action similar to polishing the toe of a shoe:


I rolled up a piece of emery paper to clean up the inside of the tangs.  Not strictly necessary, I think, since there's nothing being joined inside of the tang.  Removing a little bit of material from the inside should help the joint to heat up quicker without risking deforming the tang:


While I was sanding down the tangs, I occasionally check fitted the fork blades to make sure I was not taking too much material off.  Once the tangs looked fairly smooth, I turned my attention back to the fork blades.

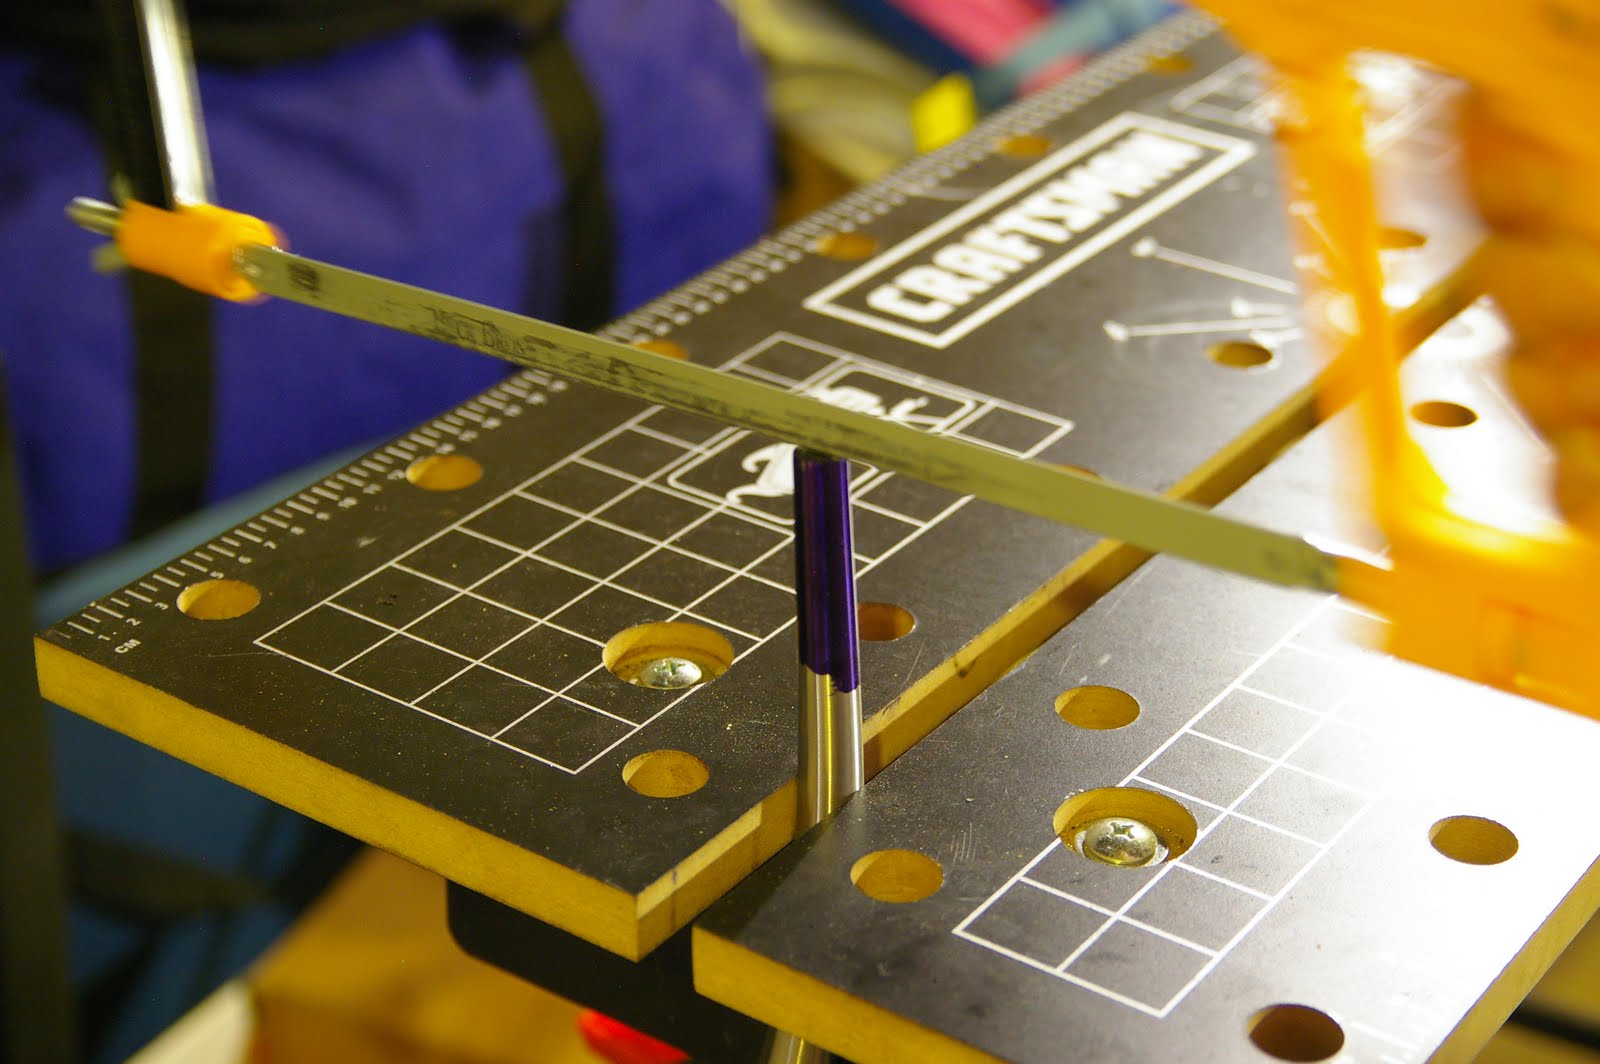
The blades need a small hole drilled in each of them to allow expanding gases to escape during the braze.  Without performing this step, the gases have nowhere to go except through the joint you're trying to make - this will leave cavities in the filler and potentially weaken the joint.  I positioned the hole on the inside of each blade, about two inches from the top of the blade.  The positioning of the hole is not terribly critical; my Raleigh has vent holes a couple of inches above the dropouts instead of near the top.  Make sure that the hole is further down the blades than the length of the fork crown tangs or lugs.

Marking the location of the holes with an automatic center punch:


I used a 3/32" bit for the holes:


After deburring the ends of the blades and removing the Dykem, this is what they look like:


Now is the time to jig up the fork.  Brush flux over the tangs and the inside of the blades, fit them together, and then secure everything in the jig.  I secured the dropouts on to the threaded rod first and then clamped the steerer securely to the block at the top of the jig.

While I was jigging the fork, before clamping the steerer tube, I noticed that the fork did not want to line up with the block that I had secured for the steerer.  Since I am fairly confident about the jig's correctness, I believe that one of the fork blades is likely ever so slightly short.  I forced the steerer against its clamping block, which left a small gap (maybe a millimeter or so) between the shoulder of the fork crown and the top of one of the fork blades.  Assuming the joint is secure, I don't think this is a safety issue - I can put some filler material in there to ensure the paint job looks clean.


The fork, fluxed and jigged:


I made sure to use metal C-clamps near the joint to avoid melting the plastic ratchet clamps.  After brazing, this is what the fork crown looks like:


And the entire fork, finally in one piece:


I let the fork cool in the jig until I could handle the steerer tube by hand; after that, I removed the clamps from the steerer and let it cool fully on the jig.  Once cool, the work is fairly routine - clean off the excess flux with a wire brush and water, file away the excess filler, and clean up the joints with emery cloth.

These joints are brazed with silver, but if your tolerances are very loose for some reason it may be necessary to use brass.

Now that the fork is completed (I'll have a photo of the finished product soon), it is time to start the frame.  I'm waiting on the Talbot book from the library, but in the meantime I can start cleaning up the lugs and cutting the head tube.

Monday, August 23, 2010

Back from Travel

I'm back from some R&R and business travel, and will post the final step of the fork build soon.  I managed to get the blades brazed on to the fork crown the day before I left, and all that's left to do is clean up the joints!  Parts for the frame have also arrived, and I'll start jigging that up as soon as I can make it down to the hardware store for some plywood.

Thursday, August 5, 2010

Dropout Brazing

Time for fire.

The plate-style dropouts must be brazed with brass; silver solder does not have the gap-filling capabilities that brass does and will not provide a strong bond.  On the other hand, socket dropouts are designed for silver solder; in fact, many styles have small posts that you wrap the solder wire around, which then melts and flows in to the joint when heated.  Pretty simple, but I decided I needed more stress in my life.

First step - bring everything outside.  The basement does not have nearly enough ventilation for any sort of torch work, and it makes me a little nervous having an open flame near lots of natural gas appliances.  In addition, there's a smoke detector directly above my work space.

I brought the vise out with the workbench and used two 6" C-clamps to hold it down.  I opted to swap out the ratchet clamps since I did not want to melt them if I got careless.


The procedure for brass brazing has one important difference from silver soldering - flux is not added before the joint is heated.  As the torch heats the joint, the filler rod is used to wipe flux on to the joint, where it seeps in and does all the normal flux activities.  There are two different options for flux application; filler rod is often sold pre-coated with flux, or you can purchase unfluxed rod and a separate can of flux powder.  I chose the plain rod with canned powder.

To apply the flux, lightly heat the filler rod as the joint is being heated, and then dip it into the can of flux.  Once the joint starts to show a color change to dull red, literally wipe the end of the filler rod against the joint to transfer the flux.  It will then melt and take on a glassy sheen.  After the joint reaches the proper temperature, add the rod the same way you join parts with silver.

Beginning to heat the joint (the little flecks on the torch are bits of flux from the first fork blade):


The metal starts to change color and show a rainbow pattern:


Flux has been applied and the metal is turning red:


Brazing begins!  I don't have any action shots of the braze itself - a third hand would be useful to control the camera as well as the torch and the rod.  The rod is somewhat difficult to control - unused, it's about three feet long, and to prevent burning myself I need to hold it about 8-10 inches from the "hot" end.  My hands aren't incredibly steady, so it tends to wander a little as I try to apply flux or push it into the joint.  The blue on the above photo is flux that I accidentally got where I didn't want it.

One side of the dropout has been joined - the brass has flowed wherever the flux went:


Not a very pretty joint, but it gets the job done.  All of the extra material will require a lot of cleanup.  Continuing on to the other side of the dropout:


And a closeup of the finished product, in all its messy glory:


The hand torch is just barely hot enough to perform this joint, which is why there are lots of little brass blobs on the dropout; the very end of the rod would heat up enough to break off and stick to the joint, but not melt any further.  I'm pretty confident that the joint is sound, but if/when I need to rebuild the fork I'm going to go with the socket style.  This method is quite a lot of work for questionable amounts of gain.

As with the silver joints, grab a bucket of water and a stiff wire brush and clean off the excess flux.  I found the brass flux to be more difficult to remove, and ended up taking most of it off with sandpaper and the small diamond files.  It's very brittle, so you may have some success lightly tapping on it with a hammer.

Back in the shop, it's time to do the cleanup work:


I removed the excess brass with a combination of flat files, small diamond files, course emery paper, and lots of sweat.  After the joint was cleaned up, the whole thing got a thorough working over with finer grades of emery paper to clean up the roughness and present a relatively polished face for future painting.


And finally, the two completed blades side-by-side:


There are only a couple more minor operations before the whole fork is jigged up and brazed together.

Tuesday, August 3, 2010

Slot and Dome


I finished the second fork blade (finally!), carefully photographed the whole thing, and now I present the process in all of its horrifying detail.  The second blade took significantly less time than the first; I think I spent about 3 hours slotting the blade, followed by another hour or more of cleanup work after the joint was brazed.

Before beginning any work, I painted the tip of the blade with Dykem and marked the orientation and depth of the cut.  The cut should be in plane with the bend in the fork blade, which should also align with the long axis of the oval section of the blade.  If you are using straight, round fork blades, orientation is less important, since you can simply rotate the blades to any orientation you wish.  Here are the "virgin" parts, minus those markings:


Finding a good way to clamp the fork blade was a bit of a challenge.  I actually broke the pin for the crank on the right side of the work bench, so I switched over to the left side.  To keep the blade from swaying, I used a ratchet clamp to hold it to the leg of the bench.


To make the initial cut, install two blades into your hacksaw.  This is not strictly necessary, but it will reduce the amount of time needed for filing and provide a wider gap for the file to grab on to.  Make sure the saw is tensioned well; I noticed that the two blades tend to bow against each other if the saw was not very tight.  Using two hands to guide the saw blades will prevent it from wandering as you begin the cut.


The slot should be 1/2" deep to give the dropout enough fork blade to join to during the braze.  This is the view after the initial saw cut:


The cut is not nearly wide enough to accept the dropout, so it must be opened further with a warding file.  An eight inch flat file is slightly narrower than the width of the dropout, so file straight down the cut and then slowly open it up by applying pressure to either side.


After about an hour, I managed to file through about half the cut:


This takes a long time, so be patient.  Keep checking that your slot is straight and properly aligned; if it starts to go askew, you can adjust and recover.  After some work, here is the slot after the file reached the bottom of the cut:


This is not yet finished; the slot is slightly wider at the top than the bottom due to the variations in my filing stroke and none of it is wide enough to accept the dropout:


Continue to open the slot with the file.  It becomes important at this point to try to keep the file moving in as straight a line as possible; this will keep the width of the slot uniform and keep it from drifting off the centerline of the fork blade.  About halfway through:


And finally, the slot is wide enough to accept the whole dropout:


The dropout appears to be sticking very far out of the fork blade; I'll return to this later in the process.  At this point, the slot must now be closed and filed open again.  Closing and reopening the slot provides more surface area for the braze joint.

You will need a vise to close the slot.  I tried many other options (including breaking a ratchet clamp and putting some dents in my workbench) before purchasing a small bench vise specifically for this purpose.  It can be temporarily clamped down to the workbench surface to provide stability.  Closing the slot looks something like this:


The first time I attempted this operation, one side of the slot bent more than the other, which left the slot skewed to one side.  I was able to literally beat it into submission by hammering it back on the anvil half of the vise.  Once again, open the slot with the hacksaw and continue with the warding file.  About halfway through the second cut-and-file operation:


At this point, you can also start doming the end of the fork blade.  Take the file and carefully start rounding the tip of the blade to achieve a rounded effect.  I left mine relatively oblong; here is the blade after opening the slot for a second time and partially rounding the tip:


Once again, close the slot with the vise.  Talbot does not mention how many iterations of this process are necessary; I found that closing the slot twice seemed to work well.  Any more and the filing would start to decrease the length of the slot.  After the second closing:


And the finished product, after opening the slot for a last time and finishing the doming:


The fork blade is just about ready to go - after removing the Dykem and cleaning the whole thing, it can be brazed.  What about the dropout?  I compared my dropouts to the ones installed in my Raleigh and noticed that the slot reached almost to the cut-out in the dropout on the Raleigh.  I decided to remove the extra tab on the dropout to achieve the same effect; I also believe that removing the tab will reduce the stresses on the braze joint, since there will be less of a torquing moment on it when the wheel hits bumps in the road.

Put the dropout in the vise:


Cut the tab off the dropout and file it flat.  This only takes one saw blade, so be sure to remove the second one from the hacksaw.  After cutting and filing:


Perform another fit check with the fork blade and open the slot more if necessary.  At this point, you're ready to braze the dropout into the fork blade.

Here's a photo of my setup as a whole:


And to conclude for the day, a comparison of the previously completed fork blade (top) and the one that is ready for brazing (bottom):


Next up: brass brazing with a dinky hand torch!